London is a city built on water. The Thames isn't just a backdrop; it’s the spine of the capital, and its bridges are the joints that hold everything together. If you want to capture the soul of this city, you don’t start with Big Ben or Buckingham Palace. You start with the steel, stone, and glass spanning the river. Specifically, three structures stand out for photographers who want images that feel iconic yet intimate: Tower Bridge, the Millennium Bridge, and the moody, Victorian elegance of Albert Bridge.
These aren’t just transit points. They are architectural statements that change character depending on the light, the weather, and your angle. Getting the shot right requires more than just pointing a camera. It demands timing, positioning, and a bit of grit when the wind picks up. Here is how to master these three giants.
The Quick Takeaways
- Tower Bridge: Best photographed from the south bank at sunset for symmetry, or from the top deck during the opening ceremony for action.
- Millennium Bridge: Requires early mornings to avoid crowds; use leading lines toward St Paul’s Cathedral for depth.
- Albert Bridge: A hidden gem for night photography; its red-and-white lights create a unique color palette against the dark river.
- Golden Rule: Shoot during blue hour (30 mins after sunset) for balanced exposure between sky and architecture.
- Gear Tip: Bring a polarizing filter to cut reflections off the Thames, especially near Tower Bridge.
Tower Bridge: The Iconic Powerhouse
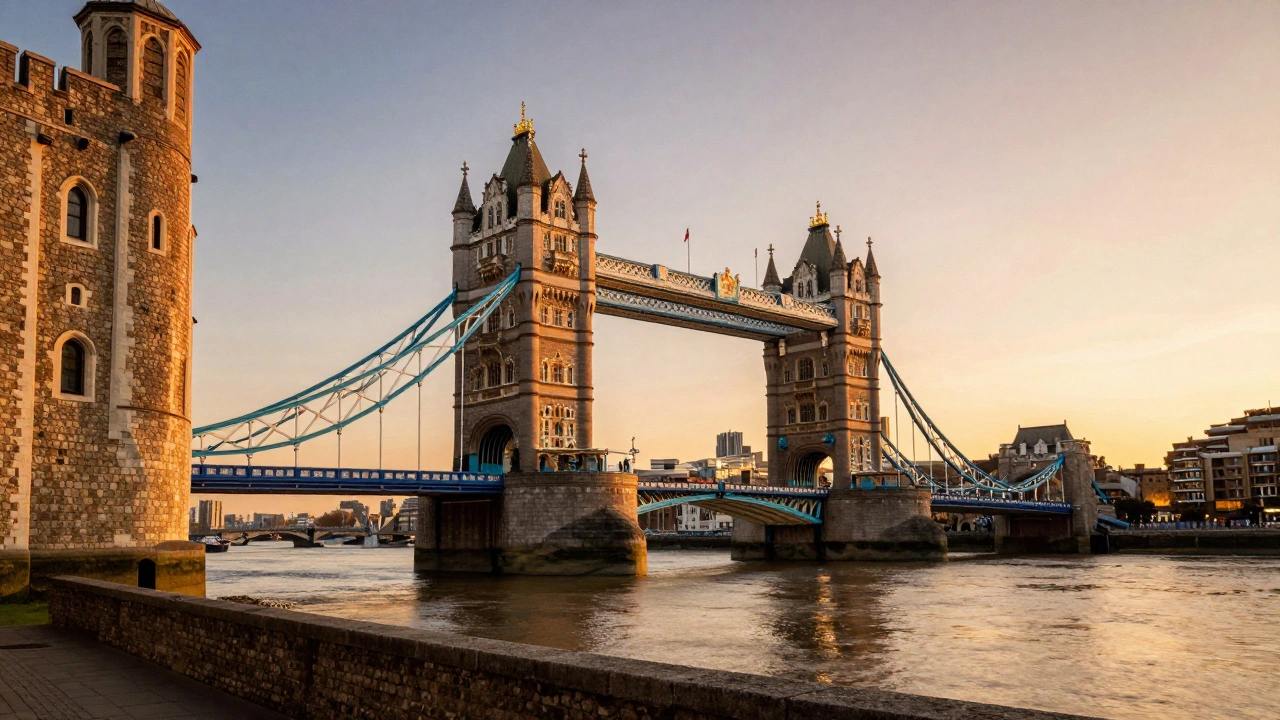
Let’s be honest. Everyone has seen Tower Bridge. The challenge isn’t finding it; it’s making your photo look different from the millions of postcards sold at souvenir shops. This structure, completed in 1894, combines Gothic Revival towers with industrial engineering. To capture its true weight, you need to get low.
The classic mistake is standing directly in front of the bridge at eye level. This flattens the perspective. Instead, walk along the South Bank path towards the Tower of London. Position yourself near the entrance to the Tower grounds. From here, you can frame the bridge with the ancient stone walls in the foreground. This adds historical context and scale. Use a wide-angle lens (16-24mm) to exaggerate the height of the towers.
| Time of Day | Best Angle | Key Element to Capture |
|---|---|---|
| Sunset | South Bank, near Tower Gardens | Warm glow on white paint vs. blue sky |
| Blue Hour | Opposite bank (St Katharine Docks) | Bridge lights turning on while sky remains deep blue |
| Midday | Inside the High Level Walkways | Ironwork details and river traffic below |
If you’re lucky enough to visit when the bridge lifts, don’t just shoot the whole thing. Zoom in on the counterweights and chains. The mechanical movement is hypnotic. Use a shutter speed of around 1/500s to freeze the motion sharply. For long exposures, wait until the ship has passed and focus on the empty gap-it tells a story of pause and anticipation.
Millennium Bridge: Sleek Lines and Urban Flow
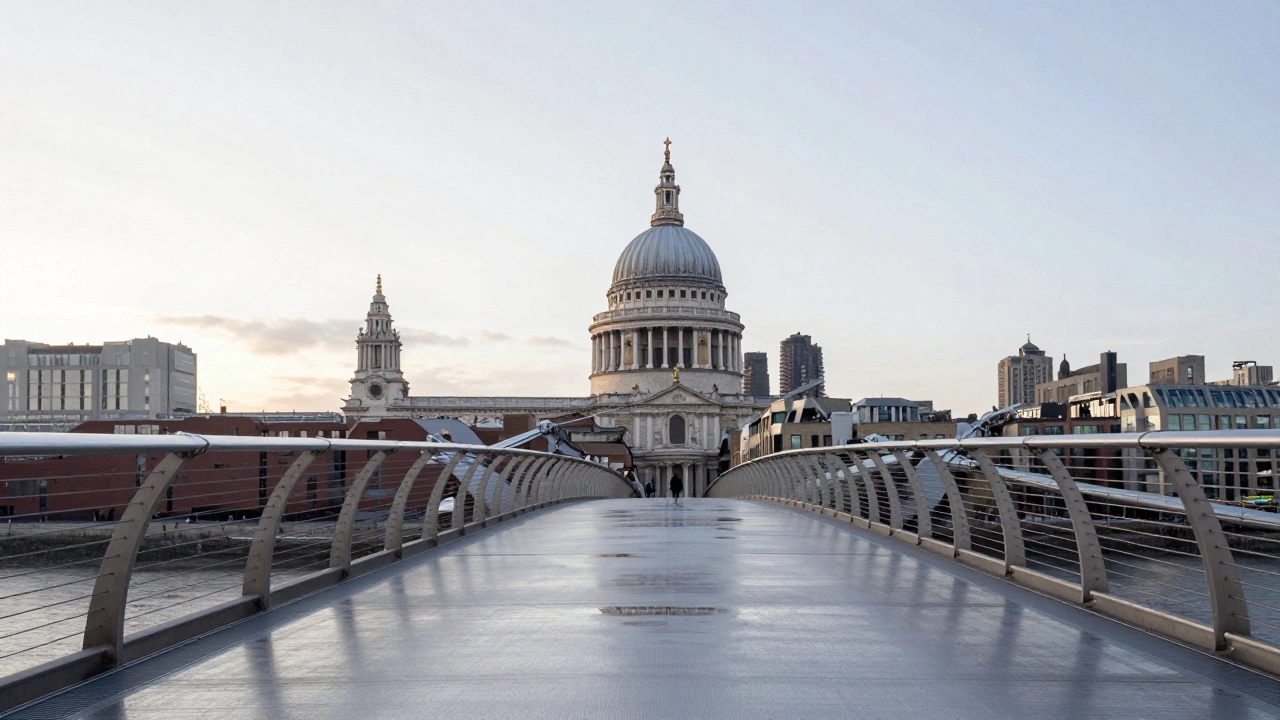
Unlike the heavy iron of Tower Bridge, the Millennium Bridge is all about tension and minimalism. Opened in 2000, this suspension footbridge connects the Tate Modern to St Paul’s Cathedral. It’s narrow, wobbly (yes, they fixed the 'wobble' issue), and packed with people. That crowd density is your biggest enemy if you want clean architectural shots.
To get unobstructed views, you have two options: go extremely early (before 7 AM) or embrace the chaos. If you choose the latter, use a slow shutter speed (1/15s or slower) with a tripod. This blurs the moving pedestrians into ghostly streaks, leaving the crisp steel cables and railings sharp. It creates a dynamic contrast between static infrastructure and human energy.
The best vantage point for the bridge itself is from the Millennium Bridge’s own western end, looking east. Frame the arch of the bridge leading directly to the dome of St Paul’s Cathedral. This composition uses the bridge as a literal leading line. On clear days, the reflection of the cathedral in the wet pavement of the nearby embankment adds another layer of symmetry. Don’t forget to check the tide levels. Low tide exposes the muddy banks, which can add texture but also distract from the clean lines of the bridge.
Albert Bridge: The Romantic Night Owl
If Tower Bridge is the loud celebrity and Millennium Bridge is the modern minimalist, Albert Bridge is the quiet romantic. Located in Chelsea, this wrought-iron bridge was designed by Rowland Mason Ordish in 1874. It’s often overlooked by tourists, which makes it perfect for photographers who hate crowds.
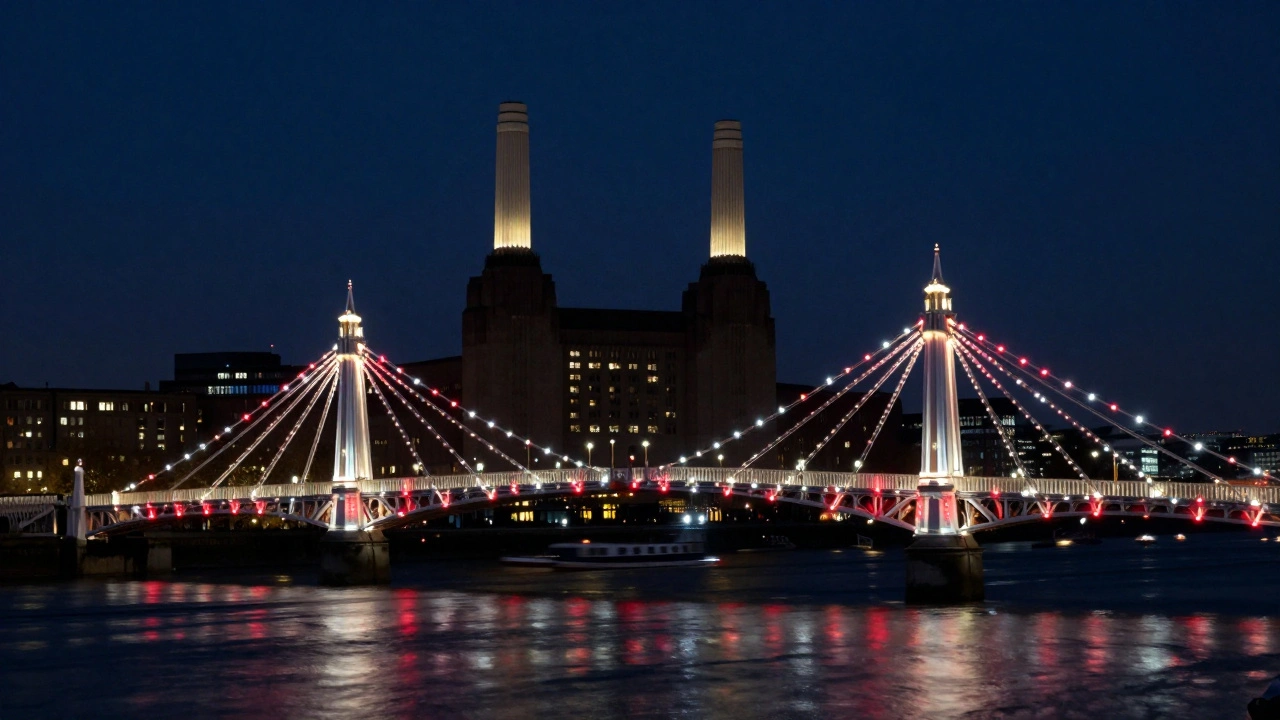
Albert Bridge is famous for its lighting system. Each lamp post features a red globe above a white one, creating a striking pattern against the night sky. This is strictly a night shoot location. During the day, it looks like any other old iron bridge. At night, it transforms into a string of colored jewels.
Position yourself on the Battersea side, near the power station. The old chimneys of the former power plant provide a gritty industrial backdrop that contrasts beautifully with the delicate ironwork of the bridge. Use a prime lens (50mm) to compress the distance between the bridge and the buildings behind it. Keep your ISO low (800-1600) to manage noise, and open your aperture to f/2.8 to let in enough light for the glowing orbs.
A pro tip: Wait for a boat to pass under the bridge. The wake reflects the red and white lights, creating abstract patterns on the water surface. This adds movement to an otherwise still scene. Since this area is less lit than central London, bring a sturdy tripod. Handholding shots here will result in blur unless you have exceptional steady hands.
Mastering Light and Reflection on the Thames
Regardless of which bridge you choose, the river plays a huge role in your image. The Thames acts as a mirror, but only under specific conditions. Windy days ruin reflections. Calm evenings create them. Check the weather forecast not just for clouds, but for wind speed. Under 5 mph is ideal for mirror-like surfaces.
Polarizing filters are non-negotiable for bridge photography. They reduce glare on the water, allowing you to see deeper into the surface and capture clearer reflections of the structures. Rotate the filter until the reflection pops. However, be careful not to over-polarize, as this can darken the sky too much and make it look unnatural.
Also, consider the season. In winter, the low sun angle casts long shadows across the bridge decks, emphasizing textures in the metal and stone. In summer, the high sun can wash out details. If shooting midday, look for dramatic cloud cover to diffuse the light and prevent harsh contrasts.
Composition Tricks for Better Bridge Shots
You don’t need expensive gear to take great photos. You need good composition. Here are three techniques to apply immediately:
- Rule of Thirds: Place the horizon line either in the top third (to emphasize the river) or bottom third (to emphasize the sky). Never center the horizon unless you’re going for perfect symmetry.
- Framing: Use trees, lampposts, or building windows to frame the bridge. This draws the viewer’s eye directly to the subject and adds depth.
- Negative Space: Leave empty space around the bridge. Especially for Albert Bridge, letting the dark sky dominate the frame makes the lights stand out more dramatically.
Don’t be afraid to crop tightly. Sometimes the entire bridge isn’t necessary. A close-up of the rivets on Tower Bridge or the cable anchors on Millennium Bridge can tell a more powerful story than a wide shot. Look for patterns, repetition, and geometric shapes within the structure.
Safety and Etiquette While Shooting
Photography involves standing in unusual places, sometimes for long periods. Be aware of your surroundings. On Millennium Bridge, watch out for cyclists who often weave through pedestrian traffic. Near Tower Bridge, stay behind barriers when ships are passing-the spray can be intense and slippery.
Respect local residents. Albert Bridge is near residential areas in Chelsea. Avoid setting up tripods late at night in ways that block sidewalks or disturb neighbors. If someone asks you to move, do so politely. Good relationships with locals often lead to better tips on hidden angles.
What is the best time of day to photograph Tower Bridge?
The best times are sunrise and sunset for warm lighting, and blue hour (shortly after sunset) for dramatic artificial lights against a dark sky. Midday offers harsh light but great detail if you use a polarizer.
How do I avoid crowds when photographing the Millennium Bridge?
Arrive before 7 AM on weekdays. Alternatively, use long exposure techniques with a tripod to blur out moving people, turning crowds into artistic streaks rather than distractions.
Is Albert Bridge safe to visit at night for photography?
Yes, it is generally safe as it is well-lit and near busy areas like Battersea. However, always keep your gear secure and stay aware of your surroundings. It’s best to go with a partner if possible.
Do I need a tripod for bridge photography in London?
A tripod is essential for night shots (like Albert Bridge) and long exposures (blurring water or people). For daytime shots, a stable hand or leaning against a wall may suffice, but a tripod ensures sharper results.
Which lens is best for capturing London bridges?
A wide-angle lens (16-35mm) is ideal for capturing the full scale and context of the bridges. A telephoto lens (70-200mm) is useful for isolating details like ironwork or compressing the background.