London at night isn’t just a city that sleeps-it glows. Streetlights stretch like golden rivers, car headlights blur into streaks of color, and the Tower Bridge lifts against a velvet sky. If you’ve ever tried capturing that magic with your camera, you know it’s not just about having a good lens. It’s about being in the right place at the right time. This isn’t a list of tourist traps. These are the spots where professionals and serious hobbyists go when they want real light trails, deep shadows, and reflections that make your photos look like paintings.
London Eye and South Bank
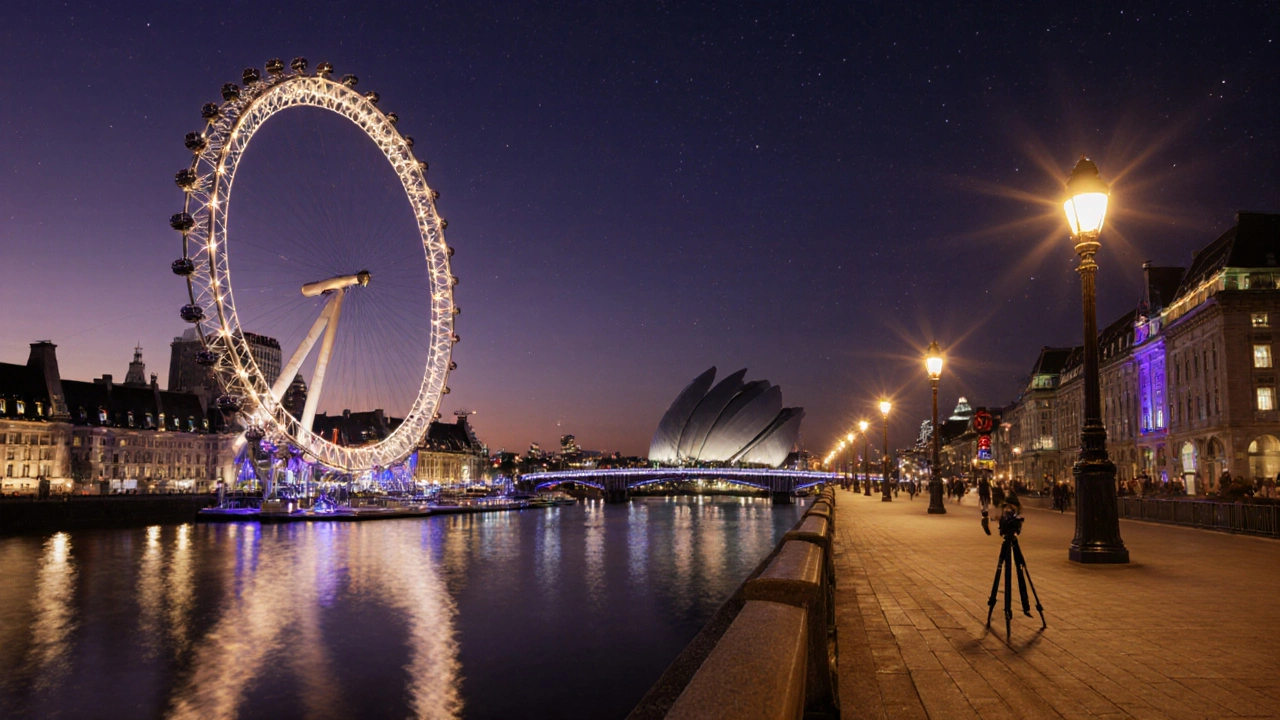
Start here if you want the classic postcard shot-but do it right. The London Eye doesn’t just sit there; it spins slowly, turning its cabins into glowing orbs that leave soft trails in long exposures. Stand on the South Bank walkway, near the Tate Modern, and set up your tripod between 8 PM and 11 PM. The key? Use a 10- to 30-second exposure with an f/8 aperture. The water of the Thames mirrors the lights perfectly, doubling the glow. Avoid shooting right after a rainstorm-it’s tempting, but puddles create messy reflections. Wait for dry pavement, and you’ll get clean, sharp mirrors of the city.
Tower Bridge and the Tower of London
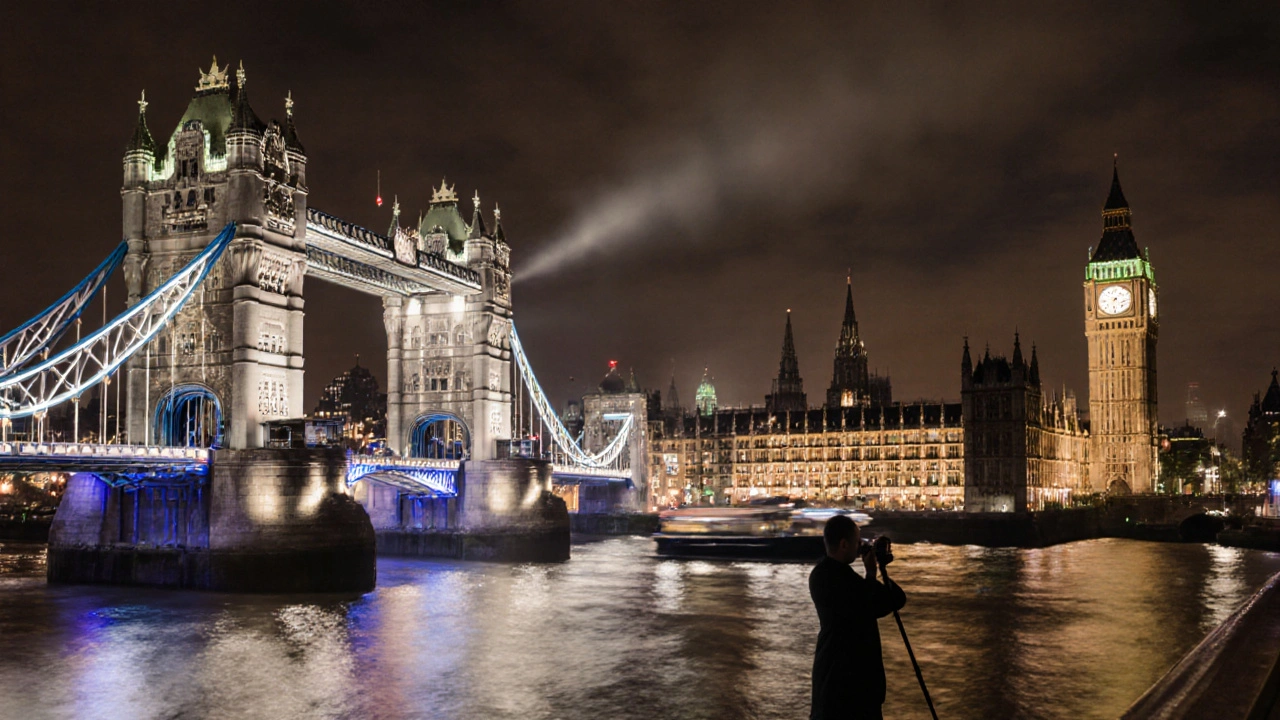
This is where London’s history meets modern light. Tower Bridge opens at night for large ships, and when it does, the two towers light up in amber and white. Set up on the south side of the bridge, near City Hall, for the clearest view. Use a 15-second exposure to capture the motion of passing boats and the slow glow of bridge lights. The Tower of London’s outer walls, lit softly in the background, add depth. Pro tip: Bring a remote shutter release. Even the slight shake from pressing the button can blur the lights. If you’re shooting in December, you’ll also catch the festive string lights along the riverbank-no extra filters needed.
Greenwich Peninsula and the O2 Arena
Most tourists skip this side of the river, but that’s exactly why it’s perfect for photographers. The O2 Arena’s dome glows like a giant lantern, and its curved surface reflects the city lights in smooth, swirling patterns. Walk along the river path toward the Emirates Air Line cable car station. Set your camera low, almost touching the ground, to capture the lights stretching into the distance. The O2’s LED roof changes color nightly, so check their website before you go. On nights with a blue moon or clear skies, the stars peek through above the city haze, adding a quiet contrast to the artificial glow. Use a 20-second exposure, ISO 400, and f/5.6. You’ll get motion blur from the cable cars without losing detail in the dome.
Primrose Hill
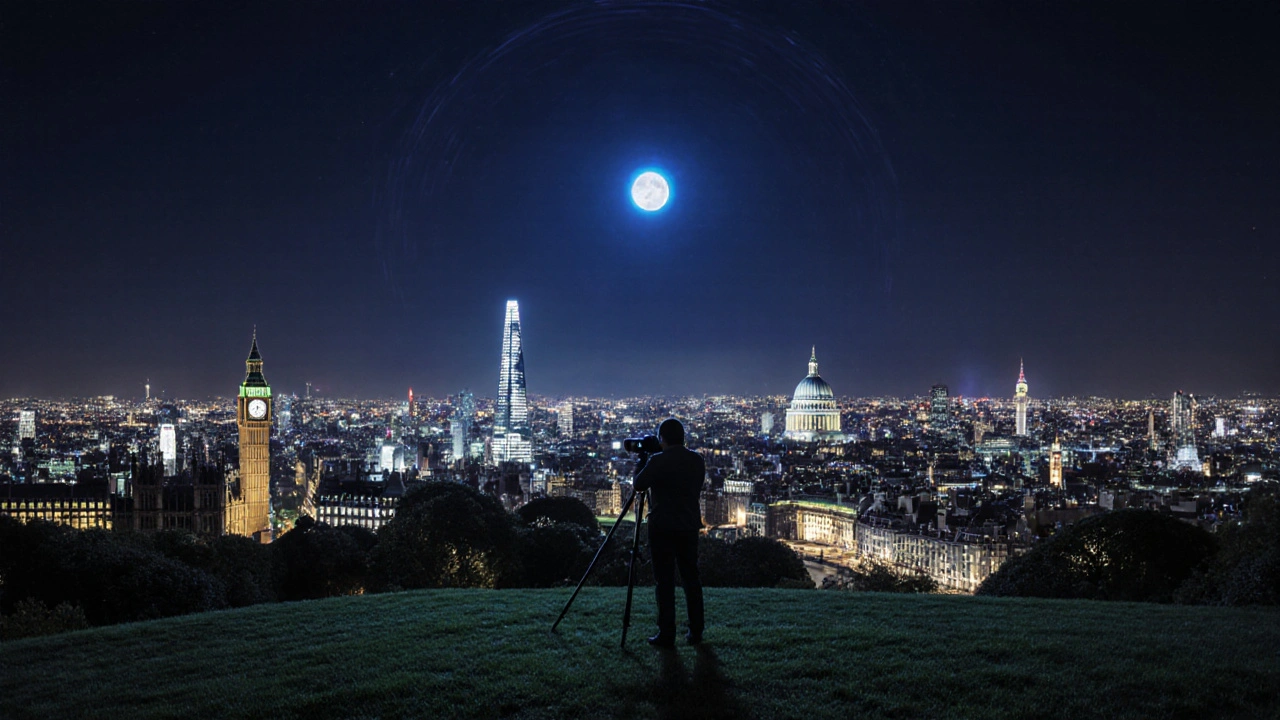
Not every great night shot comes from water or bridges. Sometimes, you need height. Primrose Hill, just north of Regent’s Park, gives you a 360-degree view of central London. The skyline here includes Big Ben, the Shard, and St. Paul’s Cathedral-all lit up, all in one frame. Arrive before sunset. You’ll need time to set up your gear before it gets dark. Use a wide-angle lens (16mm or wider) and focus on the distant lights. The trick? Don’t overexpose the buildings. Let the sky stay slightly dark to make the city pop. Many photographers come here on weekends, so go on a weekday for fewer people and cleaner shots. A polarizing filter isn’t needed at night, but a lens hood is-city lights cause flares if you’re not careful.
Hampton Court Palace and the Thames
Want something quieter, with a touch of old-world charm? Head to Hampton Court Palace, about 20 minutes by train from Waterloo. The palace is beautifully lit at night, and the Thames flows calmly in front of it. Set up on the west bank, near the old boathouse, for a symmetrical shot of the palace’s red brick walls reflected in the water. The lights here are softer than downtown, making it ideal for longer exposures-30 to 60 seconds. You’ll capture the gentle ripples from passing river barges. The palace grounds close at 5 PM, but the public river path stays open. Bring warm clothes-it’s windier here than in central London. And if you’re lucky, you’ll see a swan gliding through the light trails.
Canary Wharf and the Docklands
If you want a futuristic look, go to Canary Wharf. The glass towers here reflect neon signs, LED billboards, and the occasional drone light show. The best spot is along the waterfront promenade near the Jubilee Park footbridge. Use a 25-second exposure to turn the moving cars on the Docklands Light Railway into glowing ribbons. The reflections on the water are sharper here than anywhere else in London because the water is calmer and the buildings are taller. Avoid shooting during rush hour-too many people and too much motion. Go between 10 PM and midnight. The lighting here is cold white and blue, so adjust your white balance to avoid a sterile look. Tweak it to 4500K for a warmer, more natural tone.
Westminster Bridge and Big Ben
This is the most photographed spot in London at night-and for good reason. Big Ben’s clock face glows gold, and the Houses of Parliament are lit in soft white. Stand on the bridge itself, near the middle, and point your camera downstream. The river carries the reflections of the lights, and the motion of boats creates gentle streaks. Use a 12-second exposure with a tripod. The challenge? Avoiding people. Walk to the far end of the bridge after 9 PM, when crowds thin out. Bring a small flashlight to check your settings without ruining your night vision. If you shoot on a Friday or Saturday, you might catch the occasional fireworks display over the Thames-just keep your shutter open for 30 seconds and you’ll capture the bursts as soft halos.
Pro Tips for Shooting in London at Night
- Use a tripod-no exceptions. Even the best cameras struggle with low light. A lightweight carbon fiber tripod (under 2kg) works best for walking between spots.
- Shoot in manual mode. Auto modes will overexpose the lights or blur your shots. Start with ISO 400, f/8, and 15 seconds. Adjust from there.
- Bring spare batteries. Cold nights drain power fast. Keep one in your pocket to stay warm and charged.
- Check the weather. Rain makes reflections better, but fog kills detail. Clear, crisp nights are ideal.
- Arrive early. The best spots fill up fast. Get there 30 minutes before sunset to set up before the lights turn on.
What Gear You Really Need
You don’t need a $3,000 camera. A mid-range DSLR or mirrorless with manual controls works fine. A 24-70mm lens covers most scenes. If you want wide shots of the skyline, bring a 16-35mm. A neutral density (ND) filter isn’t necessary unless you’re shooting during twilight. A remote shutter release saves your shots from blur. And always carry a microfiber cloth-London’s damp air leaves condensation on lenses.
When to Go
Winter (November to February) gives you the longest nights and clearest skies. December has festive lights, but it’s also the busiest. January and February are quieter, with fewer tourists and better light conditions. Avoid August-London’s summer nights are too short, and the air is hazy. The best months for sharp, high-contrast shots are October and November.
Can I take night photos in London without a tripod?
Technically yes, but you won’t get the results you want. Night photography needs long exposures-usually 10 seconds or more. Handheld shots at those speeds will be blurry, even with image stabilization. A small tabletop tripod costs under £30 and fits in a backpack. It’s the one piece of gear that makes the difference between a blurry mess and a stunning light trail.
Are these locations safe at night?
Yes, all the spots listed are well-lit, public, and frequently visited by locals and tourists alike. Tower Bridge, South Bank, and Canary Wharf are busy until midnight. Primrose Hill and Hampton Court are quieter, but still safe-especially if you go with a friend. Avoid isolated areas near the river after 1 AM. Stick to main paths and keep your gear close.
Do I need a special camera for light trails?
No. Any camera that lets you control shutter speed, aperture, and ISO will work. Even modern smartphones with Night Mode can capture decent light trails if you hold them steady on a wall or railing. But for true control and clarity, a DSLR or mirrorless with manual settings gives you far better results. The key isn’t the camera-it’s how you use it.
What’s the best time to shoot during the week?
Weeknights-Tuesday through Thursday-are ideal. Weekends mean crowds, especially on South Bank and Westminster Bridge. On weekdays, you’ll have the best spots to yourself after 9 PM. You’ll also get cleaner reflections with fewer people walking through your frame. Plus, fewer people means less chance of someone accidentally stepping into your shot.
Can I use a phone app to help with night photography?
Yes. Apps like ProCam (iOS) or Manual Camera (Android) let you control shutter speed and ISO manually. Some even have a built-in light meter and histogram. Use them to avoid overexposing the lights. But don’t rely on auto modes-even in these apps. Set your exposure manually for consistent results. The best phone shots come from people who treat them like real cameras, not point-and-shoots.
What to Do Next
Start with one location. Pick the one closest to where you’re staying. Try it on a clear Tuesday night. Bring your tripod, set your camera to manual, and take five shots at different exposures. Review them on your laptop later. You’ll learn more in one night than from five YouTube tutorials. London’s night lights don’t wait. They change every hour. Go when you’re ready.